
alex_aldo - Fotolia
How to set up Microsoft Teams on WVD
Organizations that rely on Microsoft Teams may want to consider deploying the application via WVD. They can learn how that process works in this step-by-step guide.

Microsoft Windows Virtual Desktop's scalability has been especially helpful during the remote work boom, but IT must learn how Windows Virtual Desktop integrates with other business technologies, such as Microsoft Teams.
Many organizations have chosen to adopt Microsoft Teams desktop app on WVD to support communication between remote workers, but sometimes, there are issues with VMs in the WVD host pool on Azure that hinder Teams' performance.
As an IT administrator, you should learn the steps to set up Microsoft Teams on virtual desktop infrastructure, what prerequisites exist for the unified communications platform on WVD and how to optimize Teams' performance on virtual desktops.
Note: Citrix Virtual Apps and Desktops and VMware Horizon can both host an image of Microsoft Teams, but this article will focus exclusively on deploying Teams on WVD-based VDI.
Prerequisites and limitations of Teams for WVD
Before you can set up Teams on WVD, you must check that you can meet the following requirements:
- There must be enough network bandwidth -- 500 Kbps or 1.5 Mbps -- for video calls, depending on the desired quality.
- The users must have a Windows 10 client device with the Windows Desktop client version 1.2.1026.0 or later.
- The users must connect to a Windows 10 or Windows 10 multiuser WVD VM.
There are some limitations on using Teams on WVD. Some of the most notable shortcomings are as follows:
- The per-machine installation does not auto update, so you must manage it in the WVD image.
- There is no support for live events.
- You cannot share the screen of an application, though you can share the complete desktop.
- There is no support for give and take.
- The maximum video resolution is 720p.
How to install Teams on WVD
You can use the following steps to install Teams on WVD.
Step 1
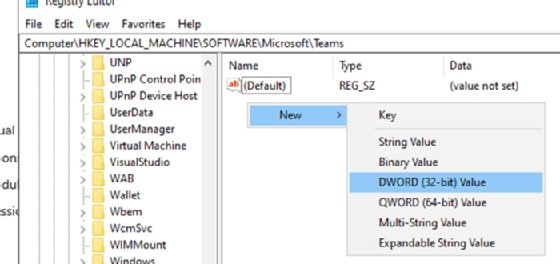
You need to create a registry key. With this key, you let the Teams installer know that you are installing Teams in a WVD environment. From the start menu, select the run type in RegEdit to make sure you start RegEdit with administrative privileges.
Browse to HKEY_LOCAL_MACHINE\SOFTWARE\Microsoft\Teams. If the Teams key doesn't exist, then you can create one by right-clicking on the Microsoft key and selecting a new key. Then, right-click on the Teams key, and create a new DWORD (Figure 1).
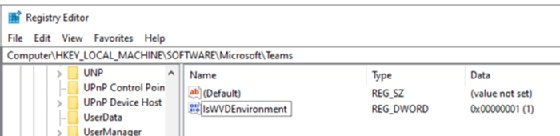
Name the new DWORD IsWVDEnvironment, and give the DWORD the value 1 (Figure 2).
Step 2
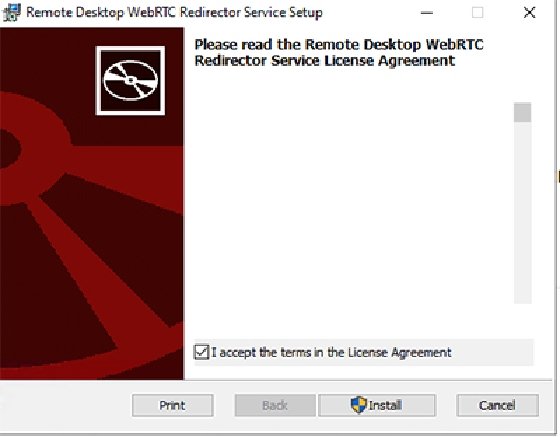
Next, you need to install middleware -- in this case, you should get a WebSocket Service -- on the WVD image.
After downloading the WebSocket Service software, you should accept the license agreement and then click on install (Figure 3).
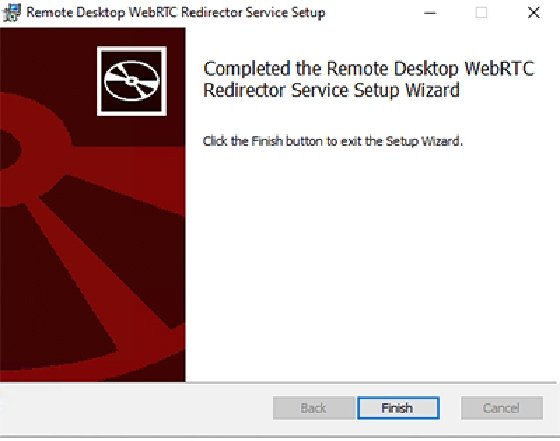
After the installation, click on the Finish button (Figure 4). If the installation fails, make sure that you are running the latest versions of Microsoft Visual C++ Redistributable and other relevant programs.
Step 3
Now, you need to download the installer for Microsoft Teams on VDI -- you can find the installer here.
Microsoft recommends installing the 64-bit version on 64-bit OSes, but there is also a 32-bit installer available as well.
Save the installer to an easy-to-find folder. One simple option is C:\Temp because you need to use the installer with the command line.
You can install and host Teams in two ways: a per-user installation or a per-machine installation. The per-user installation will install Teams in the user profile folder.
This can clog up your profiles, and it can result in some remote worker management difficulties in a Windows 10 multi-session situation. That's why the second method is recommended. The per-machine installation installs Teams in the Program Files (x86) folder, and you can just give your users a shortcut to Teams from there. The only downside is that Teams does not automatically update itself with the per-machine installation. In this scenario, you need to actively manage the version of Teams in your WVD image (Figure 5).
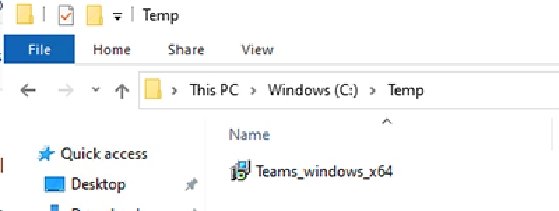
Now that the installer is in C:\Temp, you can use the following command line to install Teams per machine:
msiexec /i "C:\Temp\Teams_windows_x64.msi" /l*v "C:\Temp\Teams_install.log" ALLUSER=1 ALLUSERS=1
To run the command, start CMD.exe as an administrator. You can also choose to run the command line with PowerShell with the start-process command (Figure 6).

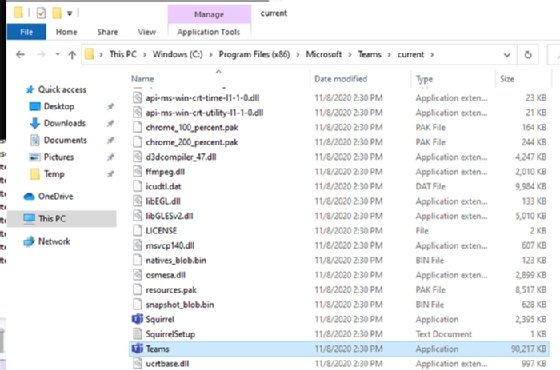
The Teams machine-wide installer will now start installing Teams. If you performed the installation correctly, Teams should be fully installed. The users can now access Teams from this path: C:\Program Files (x86)\Microsoft\Teams\current\Teams.exe (Figure 7).
Note: This approach will only install Microsoft Teams for your WVD environment. If you want to install Microsoft Teams via Microsoft 365, on a per-machine basis or with another approach, you'll have to find another method to handle this approach.
AV redirection on Teams and how to test it
The WVD VMs often don't have graphical power, which means that running a video chat will cause high CPU consumption and lead to performance issues and poor call quality.
Even switching to voice chat could still result in poor call quality and consume too much CPU. Organizations often deploy WVD in a multiuser capacity. This means that multiple users access one VM, and thus they share a CPU. IT administrators can help mediate issues that come with CPU depletion with audiovisual (AV) redirection.
AV redirection uses the power of the end users' devices to load the video and voice chats. This means that users will rely on their device CPU and GPU to load the chat and the WVD machine will not have a high CPU consumption anymore. Also, UX will drastically improve because the AV quality will be almost the same as local Teams.
The installation method above accounts for AV redirection compatibility and support. With the installation and setup of Microsoft Teams on WVD done, it's time to test if everything is working correctly.
To do this, click on your profile picture in the top-right corner on Teams, and then click on About and select Version (Figure 8).
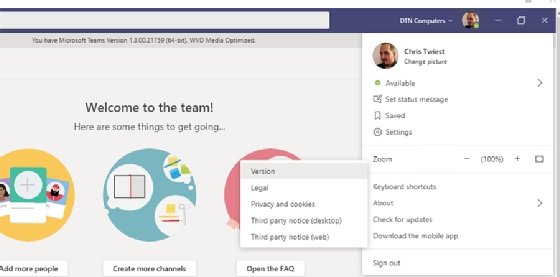
Now, the version bar will show the version of Microsoft Teams, and it should now say WVD Media optimized. If the WVD Media optimized message is not shown, restart Teams, and check if all the prerequisites are present.
Optimize Teams
The final step for WVD admins is to optimize Teams. By default, Teams uses hardware and GPU acceleration, which your WVD machine might not have, depending on what VM type you have chosen in Azure Active Directory. Also, Teams auto starts for all users, and this might cause an extra load during a login storm. You can disable these features for Teams in the user config. The config is saved in the user profile in a JSON file named desktop-config.json. You can find it here: C:\Users\%USERNAME%\AppData\Roaming\Microsoft\Teams\desktop-config.json.
To make sure that Teams doesn't use hardware acceleration on the WVD machine, you need to set the disableGpu setting to True. Here, you can also set openAtLogin to False (Figure 9).

The easiest way to implement these optimizations is with a PowerShell script. You must run it as a User login script with a Group Policy Object, and this will deploy the settings to the end-user machines.